Facebook Conversions API Gateway in 6 easy to follow steps
Step 1: Open Facebook Events Manager
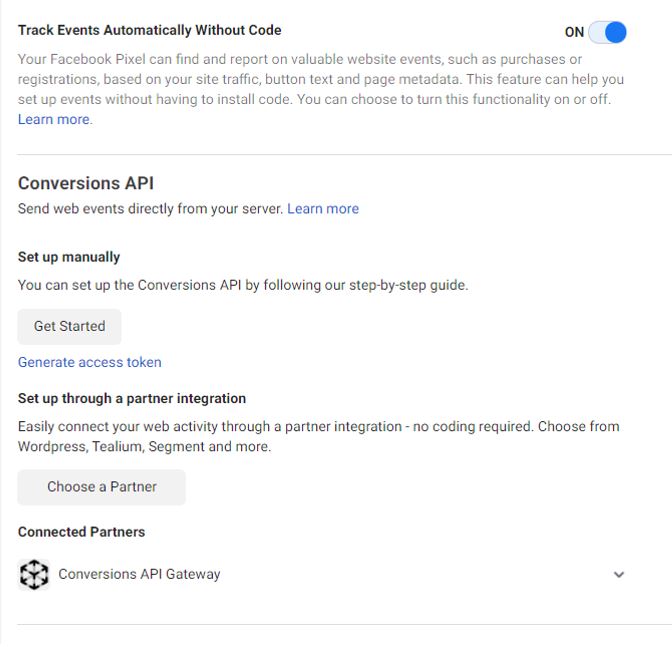
In this article you will learn how to setup the Facebook Conversions API using the new Conversions API Gateway method. The first step is to visit Events Manager within Facebook Business Manager and select the Facebook Pixel you would like to connect. Click the ‘settings’ tab and scroll down to the ‘Conversions API’ section where you’ll need to choose the partner integration.
Click the ‘Choose a Partner’ button and select the ‘Conversions API Gateway’ method.
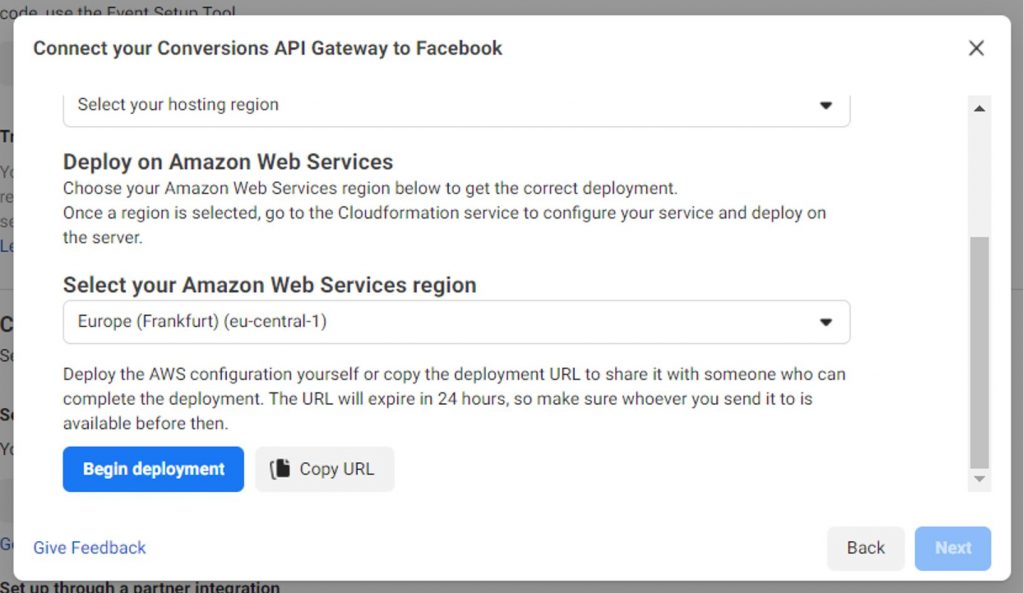
A setup wizard will open where you will need to enter the domain name(s) you would like to connect to the Conversions API gateway. You will also need to provide a subdomain to access the gateway after setup.
Screenshot source: Facebook Convesions API Gateway setup Wizard
Next, you’ll need to select a deployment method. In this tutorial, we are setting up a new gateway, in that case you just need to select the hosting region of your Amazon Web Services region.
You can now proceed and click the ‘Begin Deployment’ button.
Screenshot source: Facebook Convesions API Gateway setup Wizard
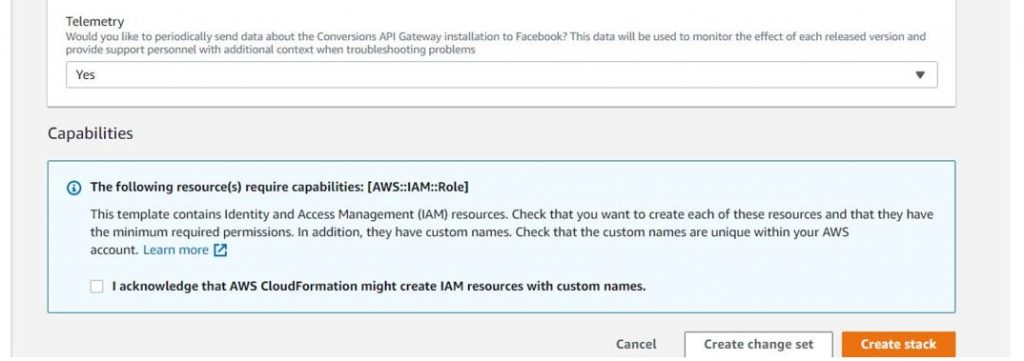
After login, you’ll be taken to the ‘create stack’ stack interface. Here, you will be using a template provided by Facebook, so the setup process should be quick and easy.
Screenshot source: AWS Amazon setup stack wizard
There isn’t much additional configuration here, you just need to provide some credentials to login into the Gateway interface and choose an instance type. That’s basically it, you can now create the stack.
Screenshot source: AWS Amazon setup stack wizard
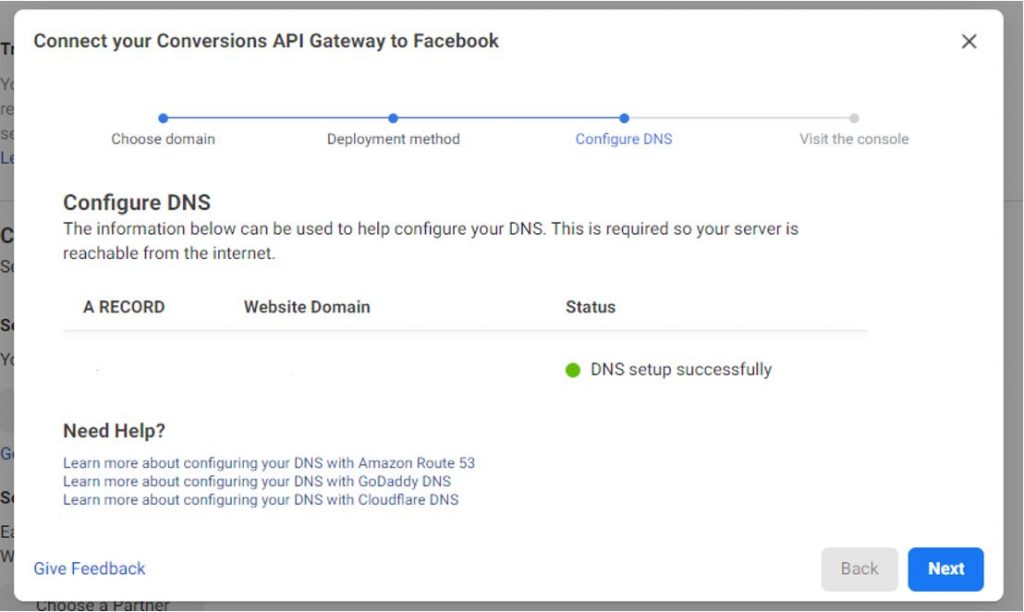
The stack creation should take five to ten minutes. When completed, you’ll need to configure a DNS A-record in your domain’s control panel to link the Gateway IP to your subdomain.
Step 5: Configure DNS
Screenshot source: Facebook Convesions API Gateway setup Wizard
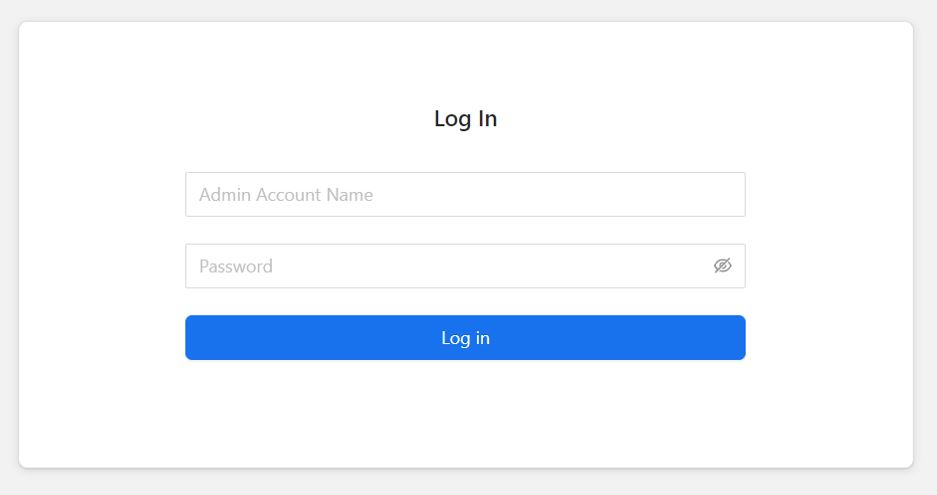
When DNS configuration is completed, you can visit the Gateway by visiting the subdomain you provided during the first steps of the Facebook setup wizard. You’ll see a login screen to access the gateway.
Step 6: Access the Facebook Conversions API Gateway
Screenshot source: Facebook Convesions API Gateway
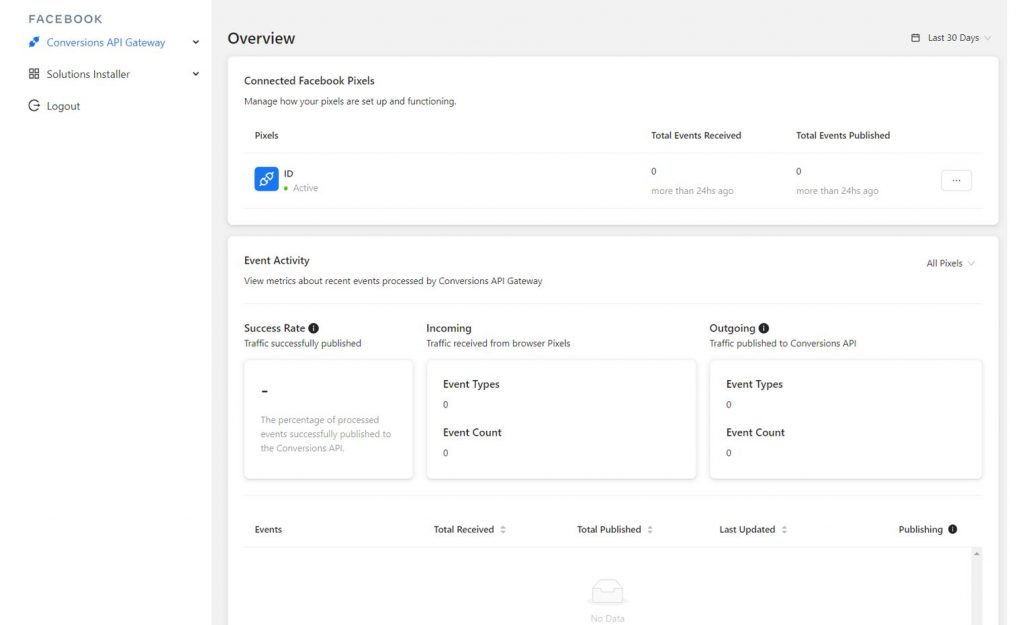
After login, you’ll be redirected to the main Gateway interface. Here you can see which pixels are connected and how many event types are incoming and published to the Conversions API. You’ll get a clear view on the different event types and counts. You can also see the success rate of how the traffic is successfully published to the conversions API.
Screenshot source: Facebook Convesions API Gateway interface
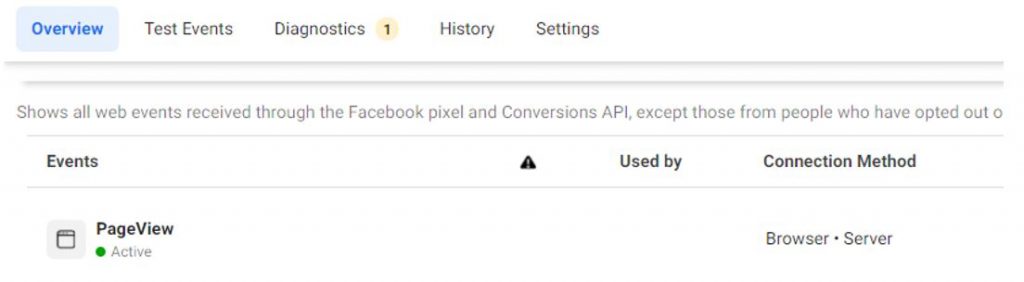
When you visit the Gateway interface again after some minutes, you should start seeing activity coming from your website. Standard events are being sent successfully. Custom Events that you have configured should also appear here.
Screenshot source: Facebook Convesions API Gateway interface
Visit the Facebook ‘Events Manager’ to confirm that the integration was setup successfully.
Bram Van der Hallen is an all-round Belgian Digital Marketer and Meta Ads expert with 16+ years experience in media planning and buying.Bram talks about Meta Ads and all things Digital Marketing on his social media and website, where more than 85.000 marketers follow his weekly updates. Click here to Follow Bram on LinkedIn.